Deploy a Contract to a Topos Subnet
The Topos Ecosystem consists of several subnets, which are generally EVM (Ethereum Virtual Machine) compatible blockchains. Although Topos encompasses other components, such as Certificate creation, the TCE, and ZK (Zero-Knowledge) proofs, the process of deploying contracts to one of its subnets is both straightforward and predictable.
Solidity is the preferred programming language for developing smart contracts on the EVM. It's a compiled, object-oriented language designed for crafting programs, called smart contracts, that execute on the EVM. If you're unfamiliar with Solidity, we recommend familiarizing yourself with the basics of this language by exploring an introductory guide before proceeding further.
The essential steps for deploying a contract to an EVM are as follows:
- Compose the contract using Solidity.
- Test your contract thoroughly prior to deploying it on the live network to ensure it operates as expected.
- Upload the compiled version of your contract to an RPC (Remote Procedure Call) endpoint specific to the network you wish to deploy on.
- Cover the gas fee required for the deployment of the contract.
- Begin interacting with your deployed contract.
Several popular toolchains are available to assist with the development, testing, and deployment of smart contracts. Here are a few notable ones:
- Hardhat: Hardhat is an open-source toolchain, developed in TypeScript, offering a comprehensive environment for smart contract development, testing, and deployment.
- Foundry: Foundry, another open-source toolkit written in Rust, supports smart contract development, testing, and deployment.
- Remix IDE: Remix provides a suite of tools in a complete, GUI-based environment for smart contract work. It features not just a standalone IDE and a VSCode plugin but also a fully functional development environment accessible directly within your web browser.
In this guide, we'll demonstrate how to deploy a simple contract to the Topos testnet using the Remix IDE to write, compile, and deploy the contract. Remix IDE is particularly useful for those new to Solidity or conducting simple contract experiments. It simplifies many deployment complexities, allowing you to concentrate on writing, testing, and deploying your code.
The Contract
If you're already familiar with Solidity, you may choose to skip ahead to Deploy to Topos or Incal. However, if you're new to Solidity, let's begin with crafting a simple contract.
Before deploying, you first need to create your contract. At the very least, a Solidity contract should start with a license declaration at the top, followed by a ``pragma` statement specifying the compatible Solidity version(s), and then the contract itself. Below is an example of a minimal contract. This contract can be compiled and deployed, although it doesn't perform any specific function.
Launch a Remix IDE with this code
However, we aim to create a contract that offers interactive capabilities and possesses a simple functionality once deployed. Therefore, let's enhance our contract by introducing storage for a string variable and adding a function that enables us to modify the data stored in this string.
Launch a Remix IDE with this code
With these modifications, our contract now has functionality. By clicking on the link provided above to the Remix IDE, you'll be able to open and edit this code directly in the IDE's editor.
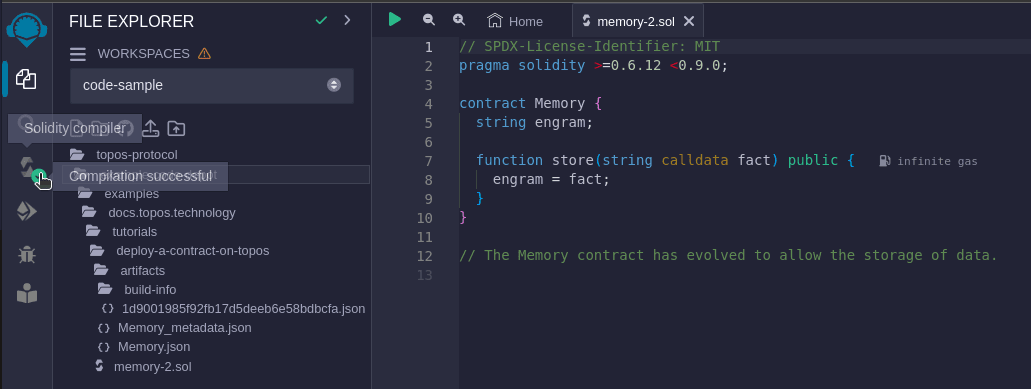
In the Remix IDE, as illustrated in the image, you'll notice a green checkmark on the left side. Hovering over it will display a tooltip indicating successful compilation. This signifies that your contract is ready for deployment!
However, before deploying your contract to a live network, including a testnet, it's prudent to conduct some basic testing. Below the icon with the green checkmark, you'll find another icon. Hovering over this will reveal the tooltip Deploy & run transactions. Clicking on this icon will open the deployment panel.
The panel that comes up will look similar to this:

Ensure Remix VM (Shanghai) is selected by clicking on the dropdown menu under ENVIRONMENT. This selection refers to an in-browser Ethereum Virtual Machine (EVM) managed by the IDE, ideal for basic testing and debugging purposes. Using this environment ensures that your contract remains within your browser.
To deploy your contract to this in-browser EVM, click the orange ``Deploy` button.
Upon successful deployment, the bottom of your IDE window will display a confirmation or an update reflecting the action.

And at the bottom of the Deploy & Run Transactions panel, you will see something similar to this:

Click on the line that reads Memory at 0X...
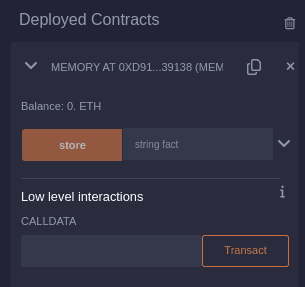
Entering text into the input box beside the orange store button and pressing it will result in a new line with a green checkmark at the bottom of your IDE window. This signifies a successful transaction, indicating that your contract executed and stored the string.
However, unrestricted string storage in Solidity poses a risk due to the potential for strings of any size. In a production network scenario, submitting a large string to this contract could lead to prohibitive gas costs. To address this, we'll update the contract to only allow strings shorter than 256 bytes, thereby preventing excessive gas consumption.
Launch a Remix IDE with this code
In Solidity contracts, the require statement serves to verify conditions, reverting the transaction if the specified condition isn't met. This mechanism ensures that certain prerequisites are satisfied before proceeding with further code execution. In our scenario, if the string exceeds 256 bytes in length, the contract halts execution to prevent further action.
Having implemented this safety measure, we'll now introduce a line to the contract enabling the retrieval of the stored data.
Launch a Remix IDE with this code
This contract is now complete. If you redeploy it into the Remix internal VM using the steps outlined earlier, you will be able to store arbitrary short strings and then retrieve them.
Deploying To Topos (or Incal)
Now that you have verified your contract's functionality, you're prepared to deploy it to a live network.
Deploying a contract on a live network requires you to possess tokens on that network to cover gas fees. For the Topos and Incal subnets, a Faucet is available to supply you with tokens. If this is your first time using the faucet, it's advisable to spend a few minutes going through the guide titled Use the Faucet to Get Testnet Tokens.
After securing your testnet tokens, you should also have connected your MetaMask wallet to both the Topos and Incal subnets, positioning you to deploy your contract to a live network.
Within the ENVIRONMENT dropdown menu, you'll find an option labeled Injected Provider - MetaMask. Please select this option.

This setting instructs Remix to deploy your contract to the network to which your MetaMask wallet is presently connected.
However, if you click the Deploy button immediately, you might not achieve the expected results. As of the current date (6 February 2024), Remix IDE defaults to compiling contracts with the latest version of the Solidity compiler, known as cancun. Yet, the EVM implementations running on the Topos and Incal subnets lag slightly behind in supporting the newest Solidity compiler versions, lacking compatibility with some of the opcodes these versions utilize. Therefore, you must recompile your contract using a compiler version supported by the Topos and Incal subnets before deployment.
Navigate to the Solidity Compiler icon. In the panel that appears, titled SOLIDITY COMPILER, you'll find an Advanced Configurations section. Click on this to expand it.
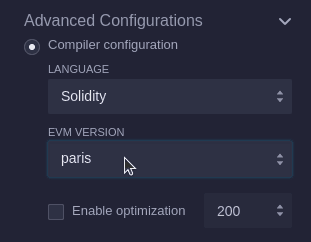
In this section, locate the dropdown menu for EVM VERSION and choose paris.
Following your selection, the IDE will automatically recompile your contract. You can then return to the Deploy & Run Transactions panel and click the Deploy button.
Upon doing so, the MetaMask extension will prompt you with a dialog, requesting confirmation for the transaction. This is because deploying a contract incurs a gas fee, albeit a small one.
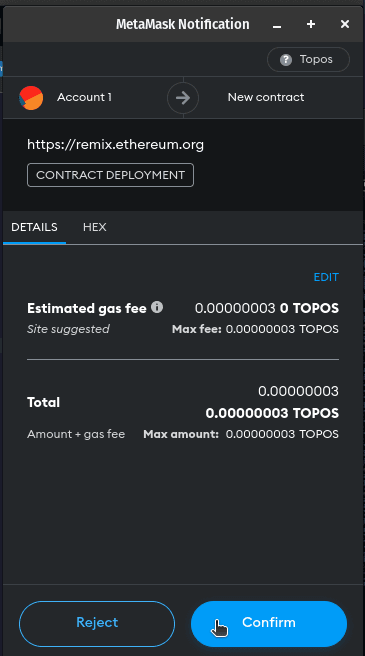
After confirming the transaction, your Remix IDE should show a transaction record that looks something like this:

Congratulations! You've successfully deployed a contract to Topos (or Incal). You're now set to interact with your deployed contract—sending data to be stored and later retrieving it. A noticeable difference from your experience with the Remix VM is that each time you send a string to be stored, MetaMask will prompt you to confirm the transaction. Similar to deploying a contract, transactions that store data on the blockchain require gas to cover the function call and data storage costs. However, calling the recall function to retrieve the stored data is free.
Summary and Wrapping Up
This guide has taken you through the steps of deploying a simple contract to the Topos testnet, utilizing the Remix IDE for writing, compiling, and deploying the contract. We started with testing the contract using the IDE's in-browser EVM and concluded with deploying the contract to a live testnet subnet.
A key takeaway when deploying contracts to the Topos or Incal subnets is to ensure your contract is compiled with the paris version of the Solidity compiler, given the current compatibility requirements.