Add Topos and Incal to Metamask
In order to work with the Topos Testnet, you need to tell your wallet about the subnets. We currently recommend MetaMask as the wallet of choice for the Topos Testnet. If you do not already have it installed, please download and install it.
This document will walk you through two different approaches for completing this. The most educational approach is to manually add the subnets to your MetaMask wallet. However, if you prefer, you can follow the procedure to automatically add the subnets to your wallet using the ERC20 Messaging App.
Add Topos and Incal to MetaMask Manually
Adding the networks to your MetaMask wallet manually is a useful exercise if you are new to MetaMask and web3 development, as it allows you to better understand the data that underlies the process.
Add Topos to Metamask
Once you have installed MetaMask, you will need to add the Topos subnet to it. To do this, open the MetaMask extension and click on the Networks dropdown.
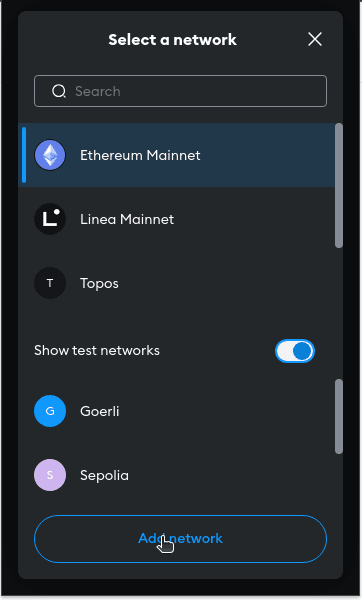
Then click on the "Add Network" button.
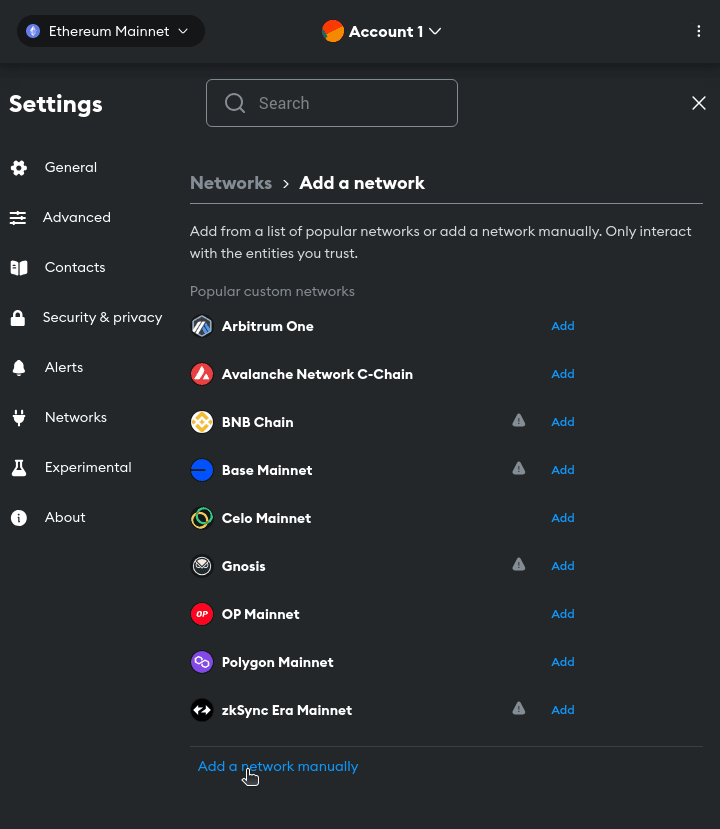
Your browser will open an a MetaMask interface to add a new network. From that page, select the "Add a network manually" button.
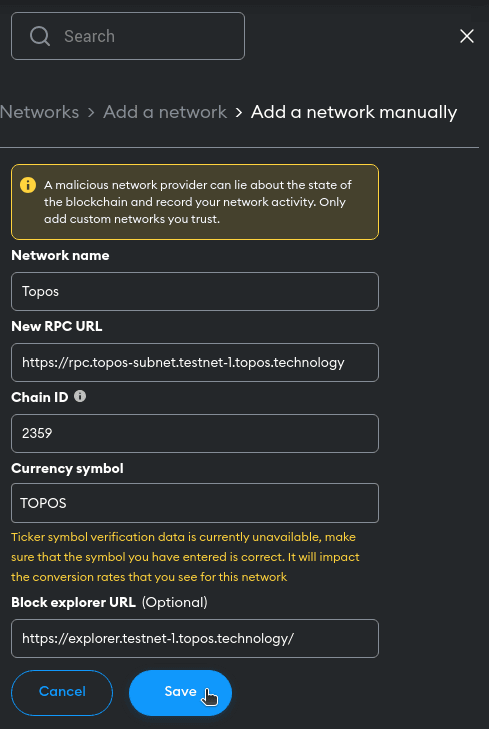
Then enter the following information and press the "Save" button:
- Network Name: Topos
- New RPC URL: https://rpc.topos-subnet.testnet-1.topos.technology
- Chain ID: 2359
- Currency Symbol: TOPOS
- Block Explorer URL: https://explorer.testnet-1.topos.technology
Add Incal to Metamask
To add Incal to Metamask, you will need to repeat the process above, but with the following information:
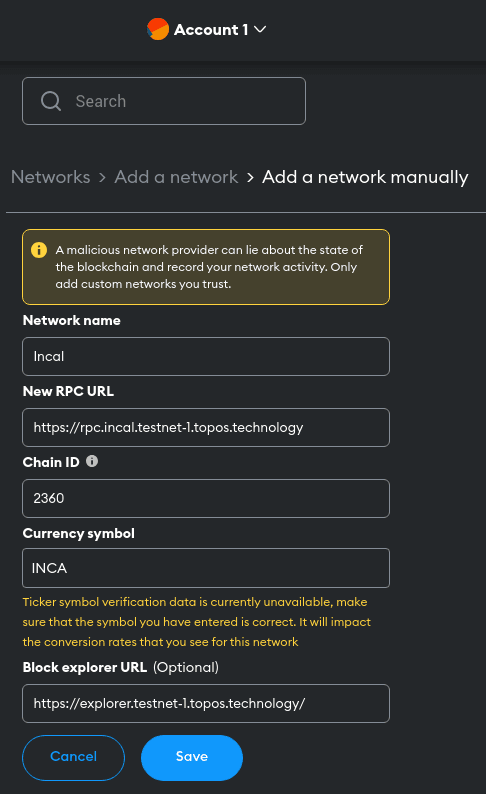
- Network Name: Incal
- New RPC URL: https://rpc.incal.testnet-1.topos.technology
- Chain ID: 2360
- Currency Symbol: INCA
- Block Explorer URL: https://explorer.testnet-1.topos.technology
Alternative Method -- Leverage the ERC20 Messaging App
As an alternative approach, you can use the ERC20 Messaging App to add the Topos and Incal subnets to your MetaMask wallet.
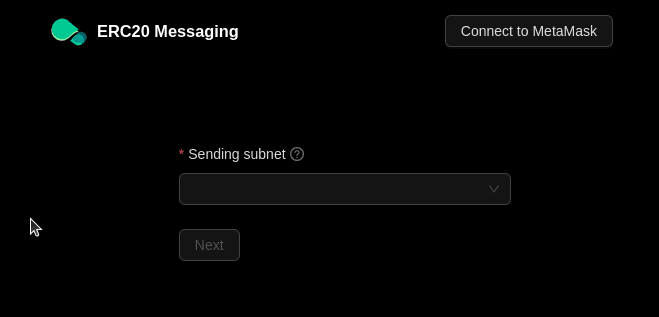
To do this, first navigate to the application. You should see a screen like this:
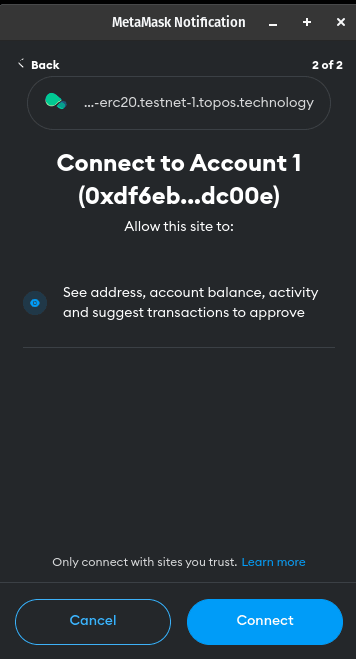
Press the Connect to MetaMask button. You should see a MetaMask popup like this:

Click Next and then Connect to the confirmation popup.
You should see the ERC20 Messaging app page change to reflect your wallet address in the upper right of the page:
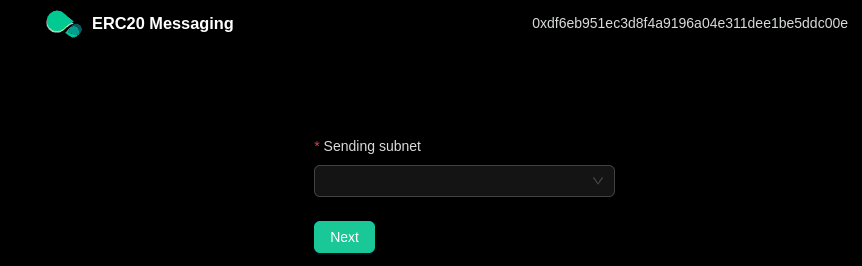
At this point, selecting a subnet from the Sending subnet dropdown will automatically trigger adding that subnet to your MetaMask wallet:
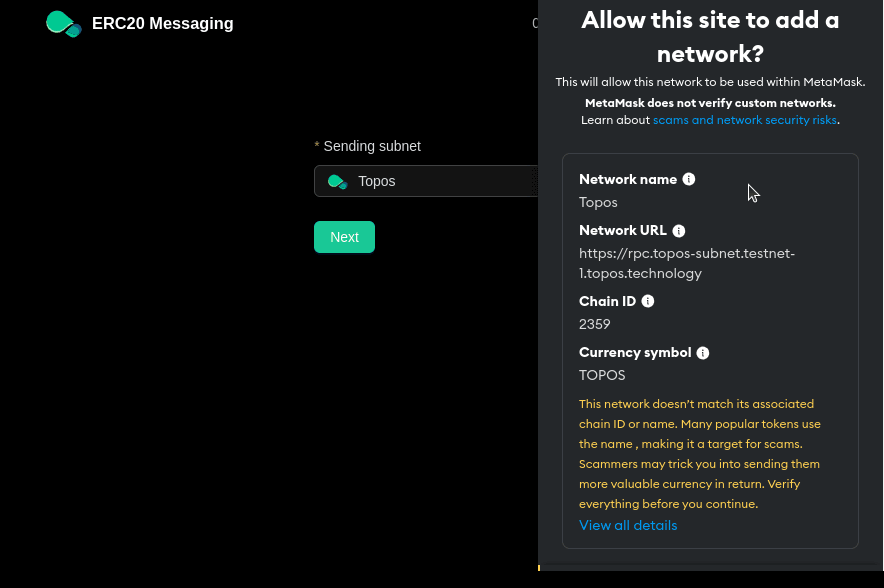
Scroll down in the popup and click 'Approve'. The network will now be added to your MetaMask wallet. You should do this for both Topos and Incal. Once you have done this for both, opening the MetaMask extension, and clicking on the Networks dropdown should show both subnets:

Wrapping Up
At this point, you should have both the Topos and the Incal subnets added to your MetaMask wallet. You will probably need to request tokens from the Topos Faucet in order to continue learning and experimenting. You can follow the instructions in our How to use the Faucet to get Testnet Tokens guide to do this.